
OnPage optimisation is the part of search engine optimisation that focuses on improvements on the page itself. The aim of all OnPage measures is to make the website easier to find in search engines.
SISTRIX – Setting up a website as a project
To analyse a webpage based on OnPage factors with SISTRIX, you have to set this up in the “Projects” area. (You can also start one-off OnPage analyses, more on that later.)
We will use thesun.co.uk as an example for this tutorial.
Once you are logged in to SISTRIX, you will find the menu item “Projects” in the navigation bar at the top of the page.

Alternatively, you can also use the direct link app.sistrix.com/projects.
Create a new project
Now let us set up a new project.
It is best to use meaningful project names – especially if you want to analyse multiple subdomains.
For our example, we would like to analyse the entire domain (start page + all sub-pages), so we use the name “thesun.co.uk website”.

The second step requires us to choose the domain, hostname or path. We will only provide the domain as well as the TopLevelDomain – we will then analyse all pages therein.
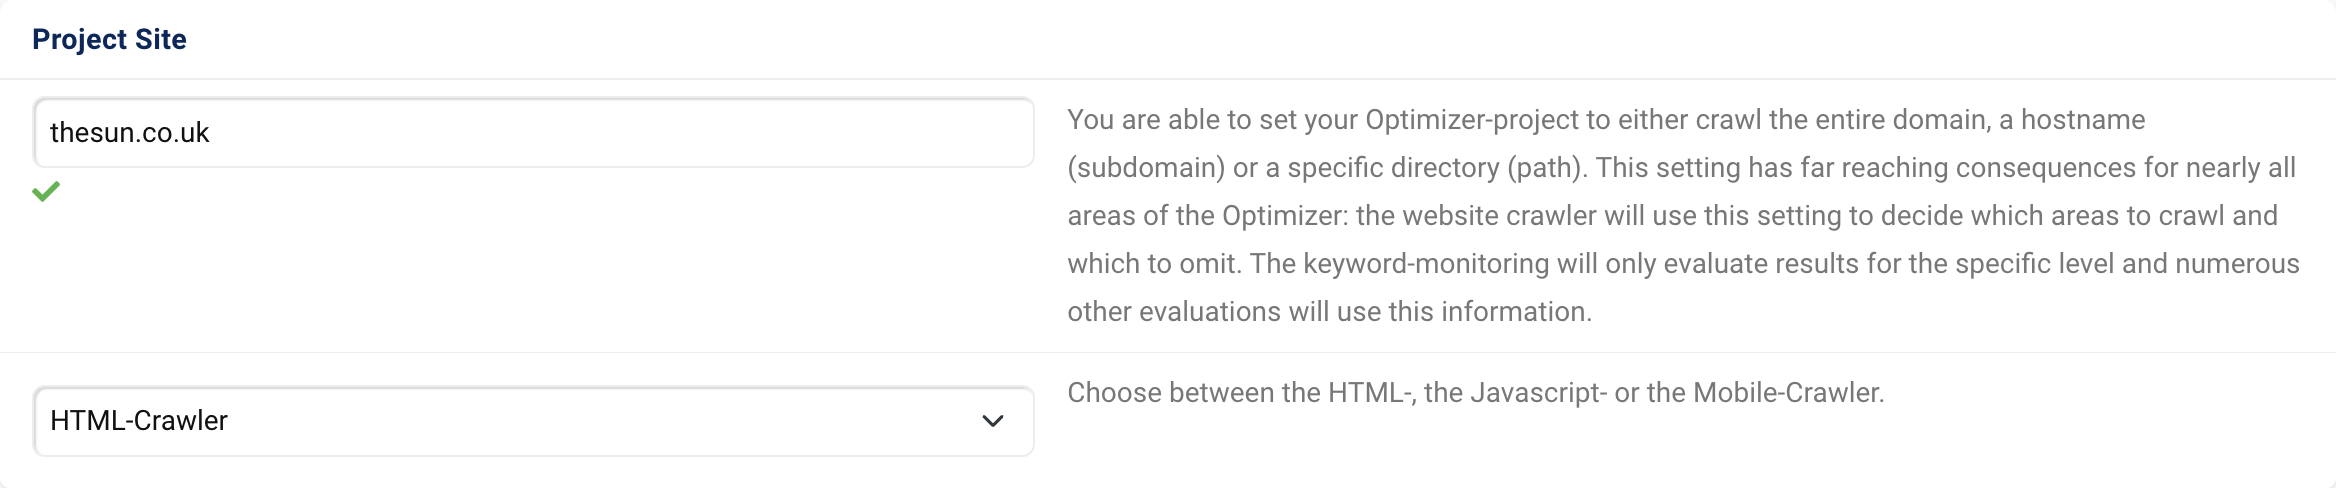
There you will also define the crawler that will be used to capture the pages.
The next steps would be to enter keywords to be monitored for the project and to specify competitors. We explain both steps in more detail in our tutorial “Create your own Visibility Index“.
You can also create a project without keywords and competitors for the time being. You can add and update them at any time in the project settings.
By clicking on the green “Create Project” button, we will now create our OnPage project.
The SISTRIX crawler will then visit the website and analyse it. Depending on the scope of the project area, this may take some time.

At the top right of the page, you can see the crawling progress. You will also be notified by e-mail once the results are ready. Time for some coffee!
The OnPage Analysis
The OnPage analysis serves to unearth weaknesses a website may have in the OnPage SEO area. Those could range from technical errors to content problems. However, most errors can usually be found on the technical side.
Since the topic as such is already complex enough, we want to make the analysis as simple as possible for you. Therefore, you can find a detailed explanation for every error that is found in your OnPage project directly in SISTRIX.
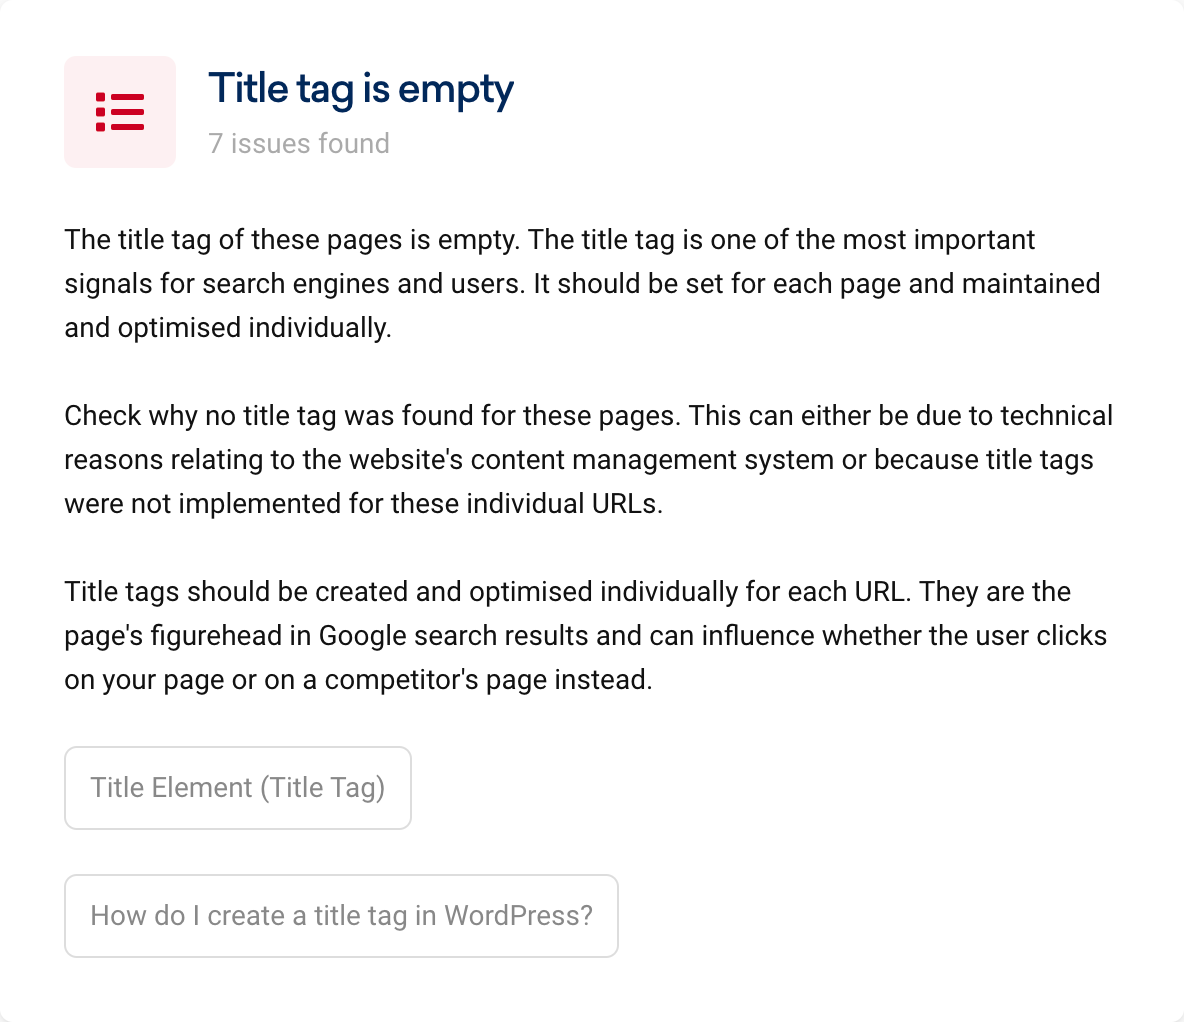
Often you will find an additional button 1, which will provide you with further information on the respective topic. You can find numerous of articles with explanations about OnPage-Optimisation in our knowledge database Ask SISTRIX.
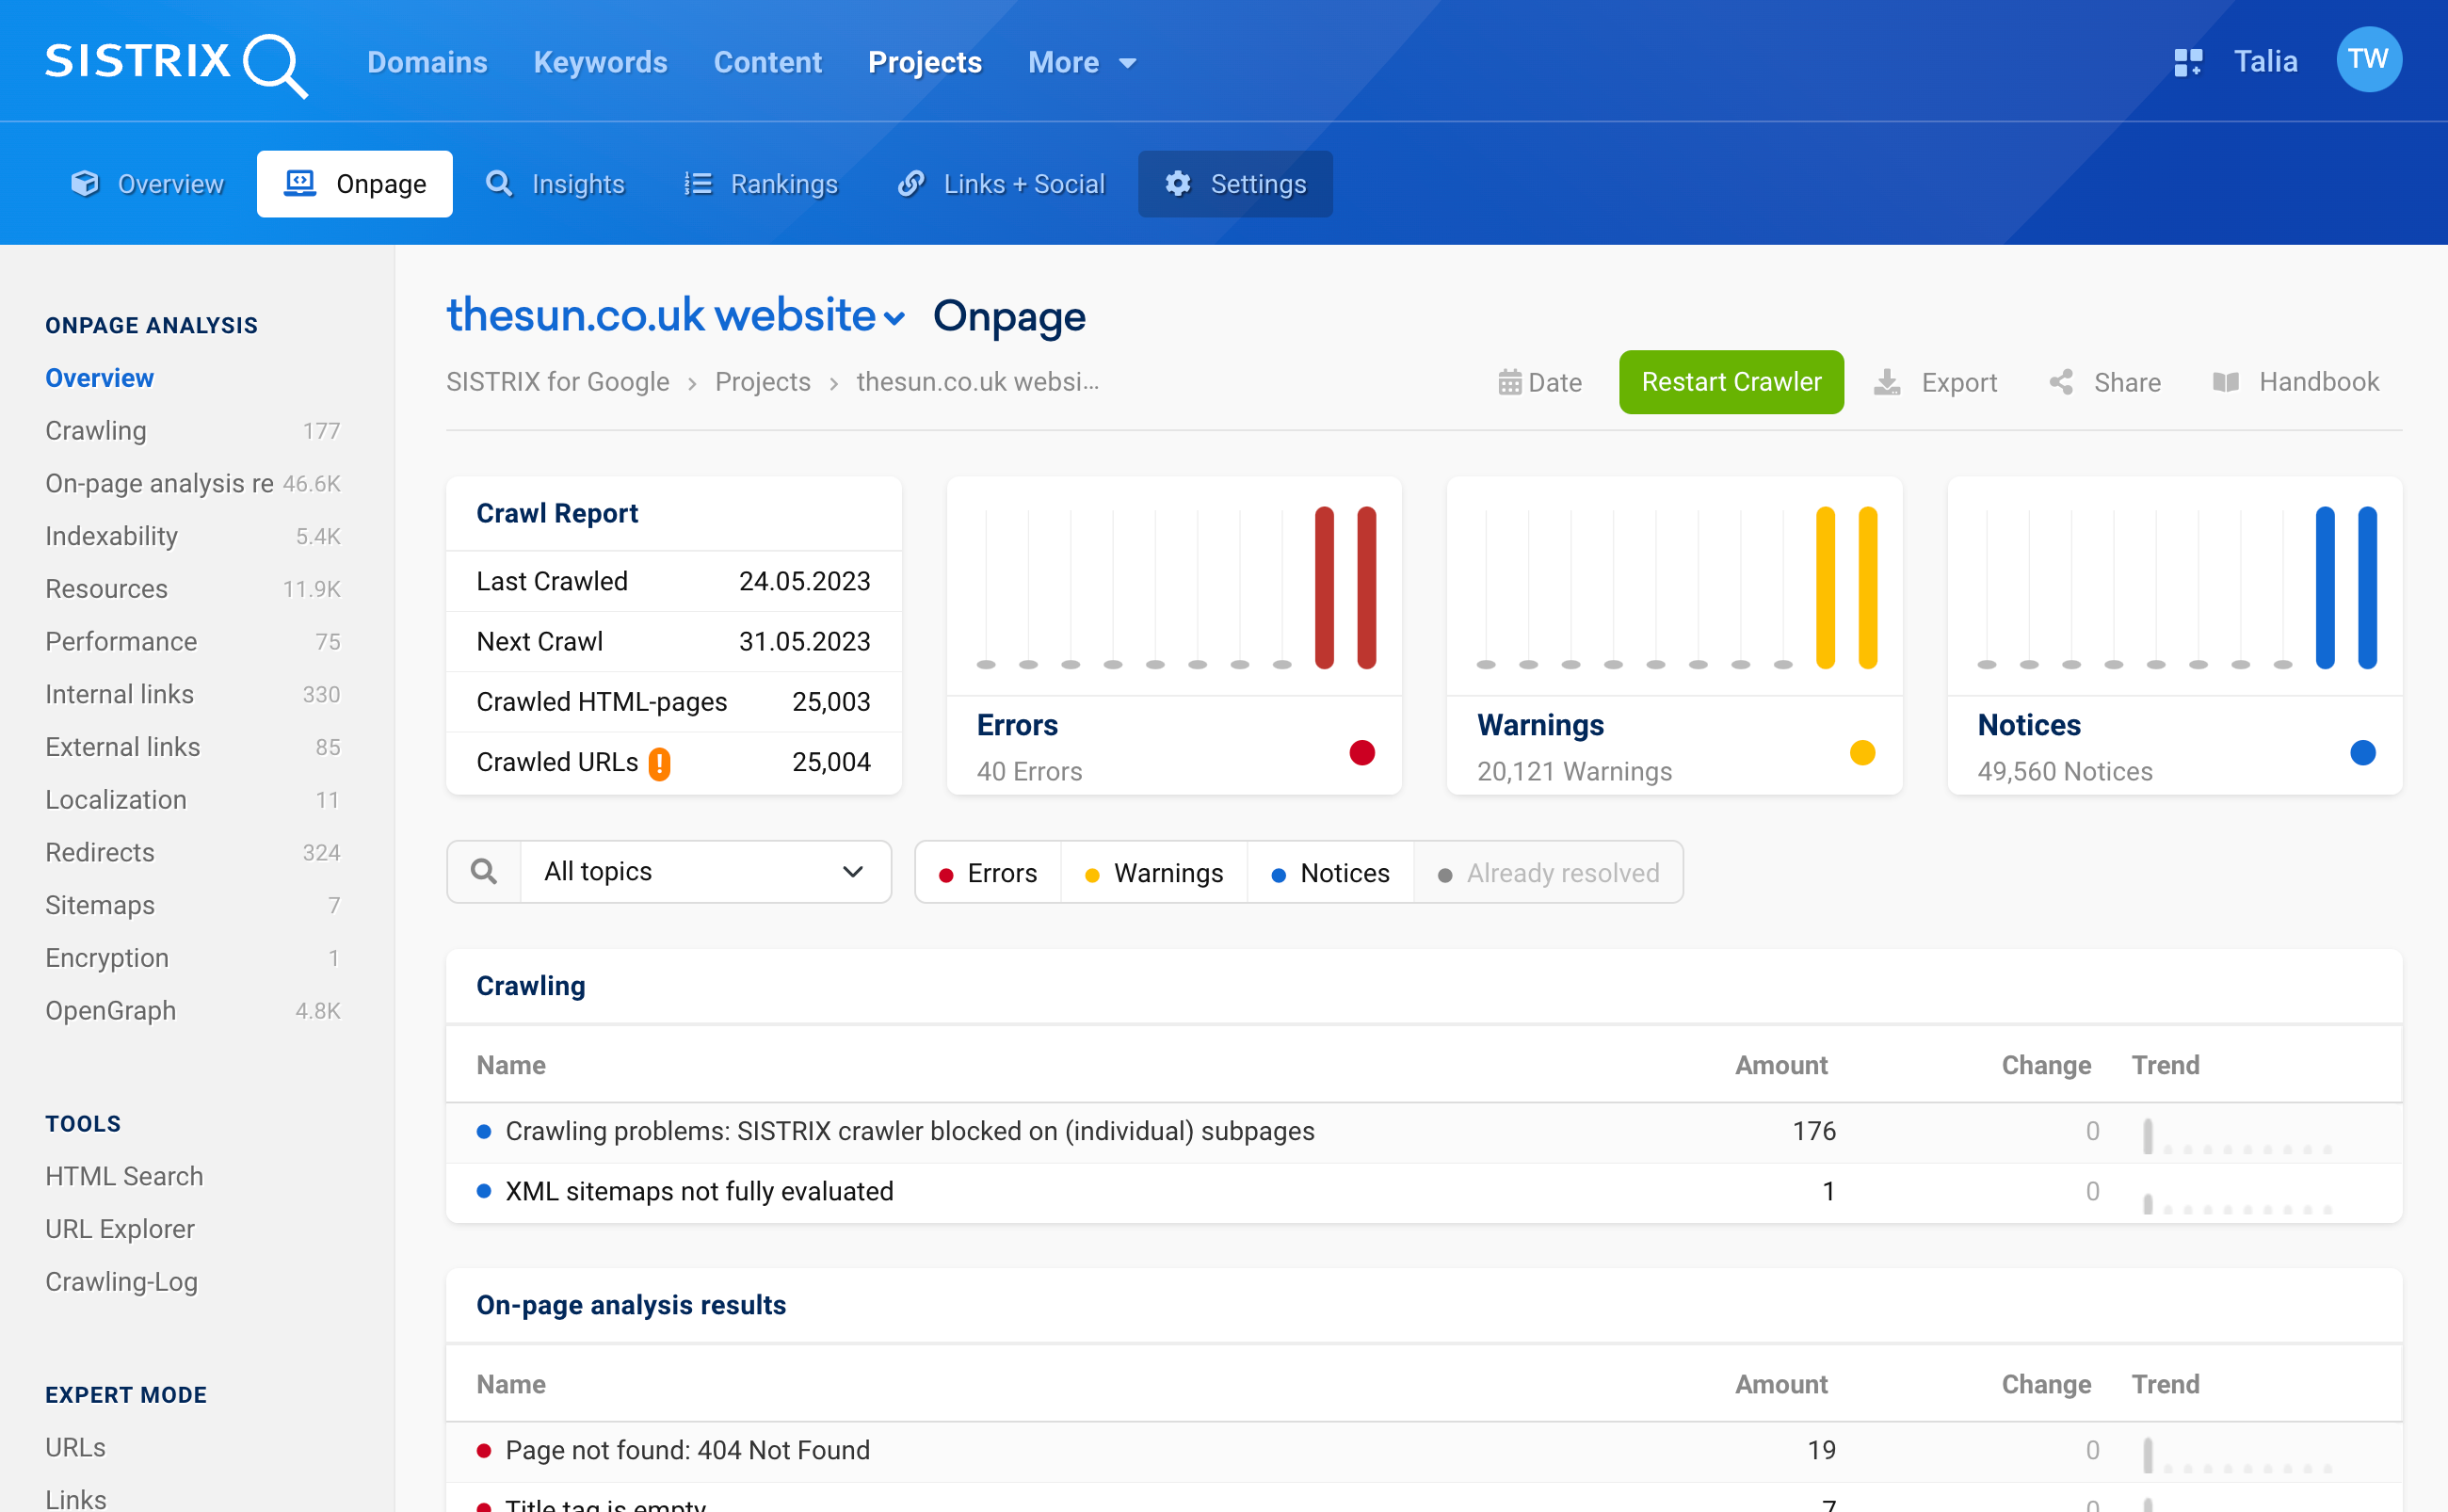
But first things first: Once your OnPage project is completed, you will find an overview of errors, warnings and notices found at the top of the Project Overview page:
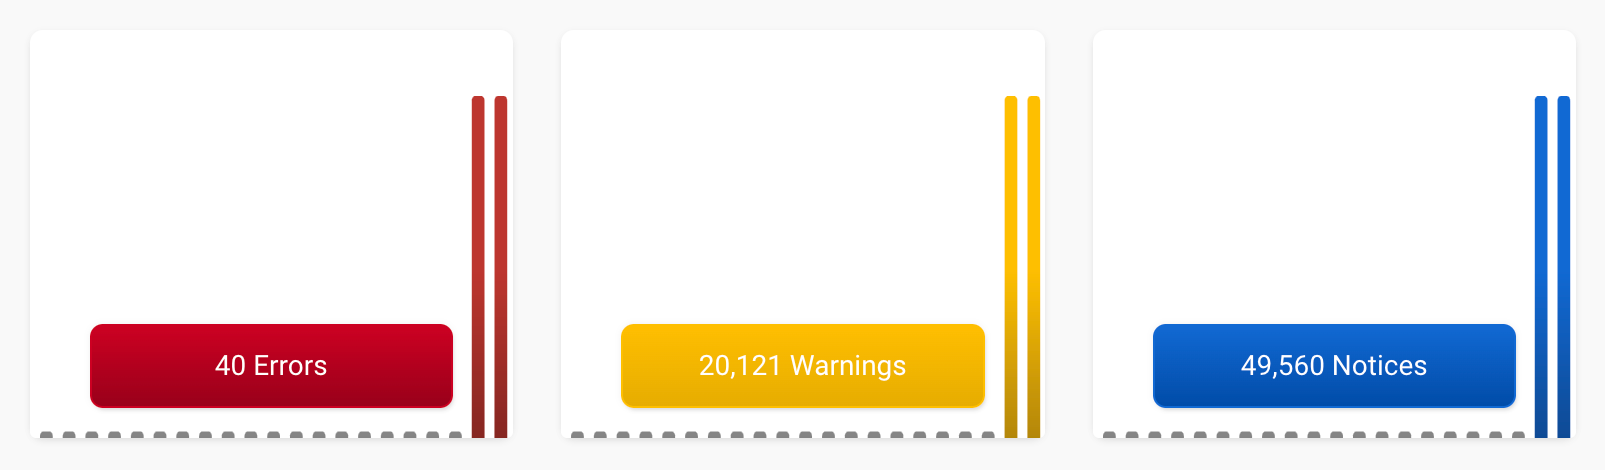
The colours will give you a hint as to the urgency of each signal.
- Possible errors include pages, images or paths not found. These are important elements that help Google find your content. Therefore, you need to take care of errors and fix them as soon as possible.
- Warnings can be title tags that are too long, missing or repeatedly used H1 headings, but also missing meta descriptions, for example. These are important points that help Google understand your content. Put these warnings on your to-do list.
- In the notices, you will find things that stood out in the analysis which you could optimise. For example, notices for things like click depth, identical images and Javascript files. Take a look at these and decide what makes sense for your site.
Once the initial crawl has finished, you can immediately access all information and start optimising your website.
When you open the project, you will find a separate project navigation bar at the top of the page.

With the help of the navigation, you will always find your way around your project. We will now take a look at the menu item “Onpage“.
You are now on the “Dashboard“, so to speak, which contains everything, as far as errors, warnings and notices regarding the OnPage optimisation of your website are concerned.
At the top you will find information about when the project was last crawled, when the next crawl is planned and how many HTML pages and URLs have been crawled in total.

With the green “Restart Crawler” button at the top of the page, you can start a manual crawl at any time. By default, your project will be crawled once a week. You can adjust this in the project settings.
You can also add every data box in the OnPage project to a report and have the corresponding information sent to you automatically per e-mail report on a weekly basis.
Analyse errors
Let us look at our example project for the domain thesun.co.uk.
The OnPage analysis reveals a few errors, some warnings and many notices. We will take a closer look at the errors.
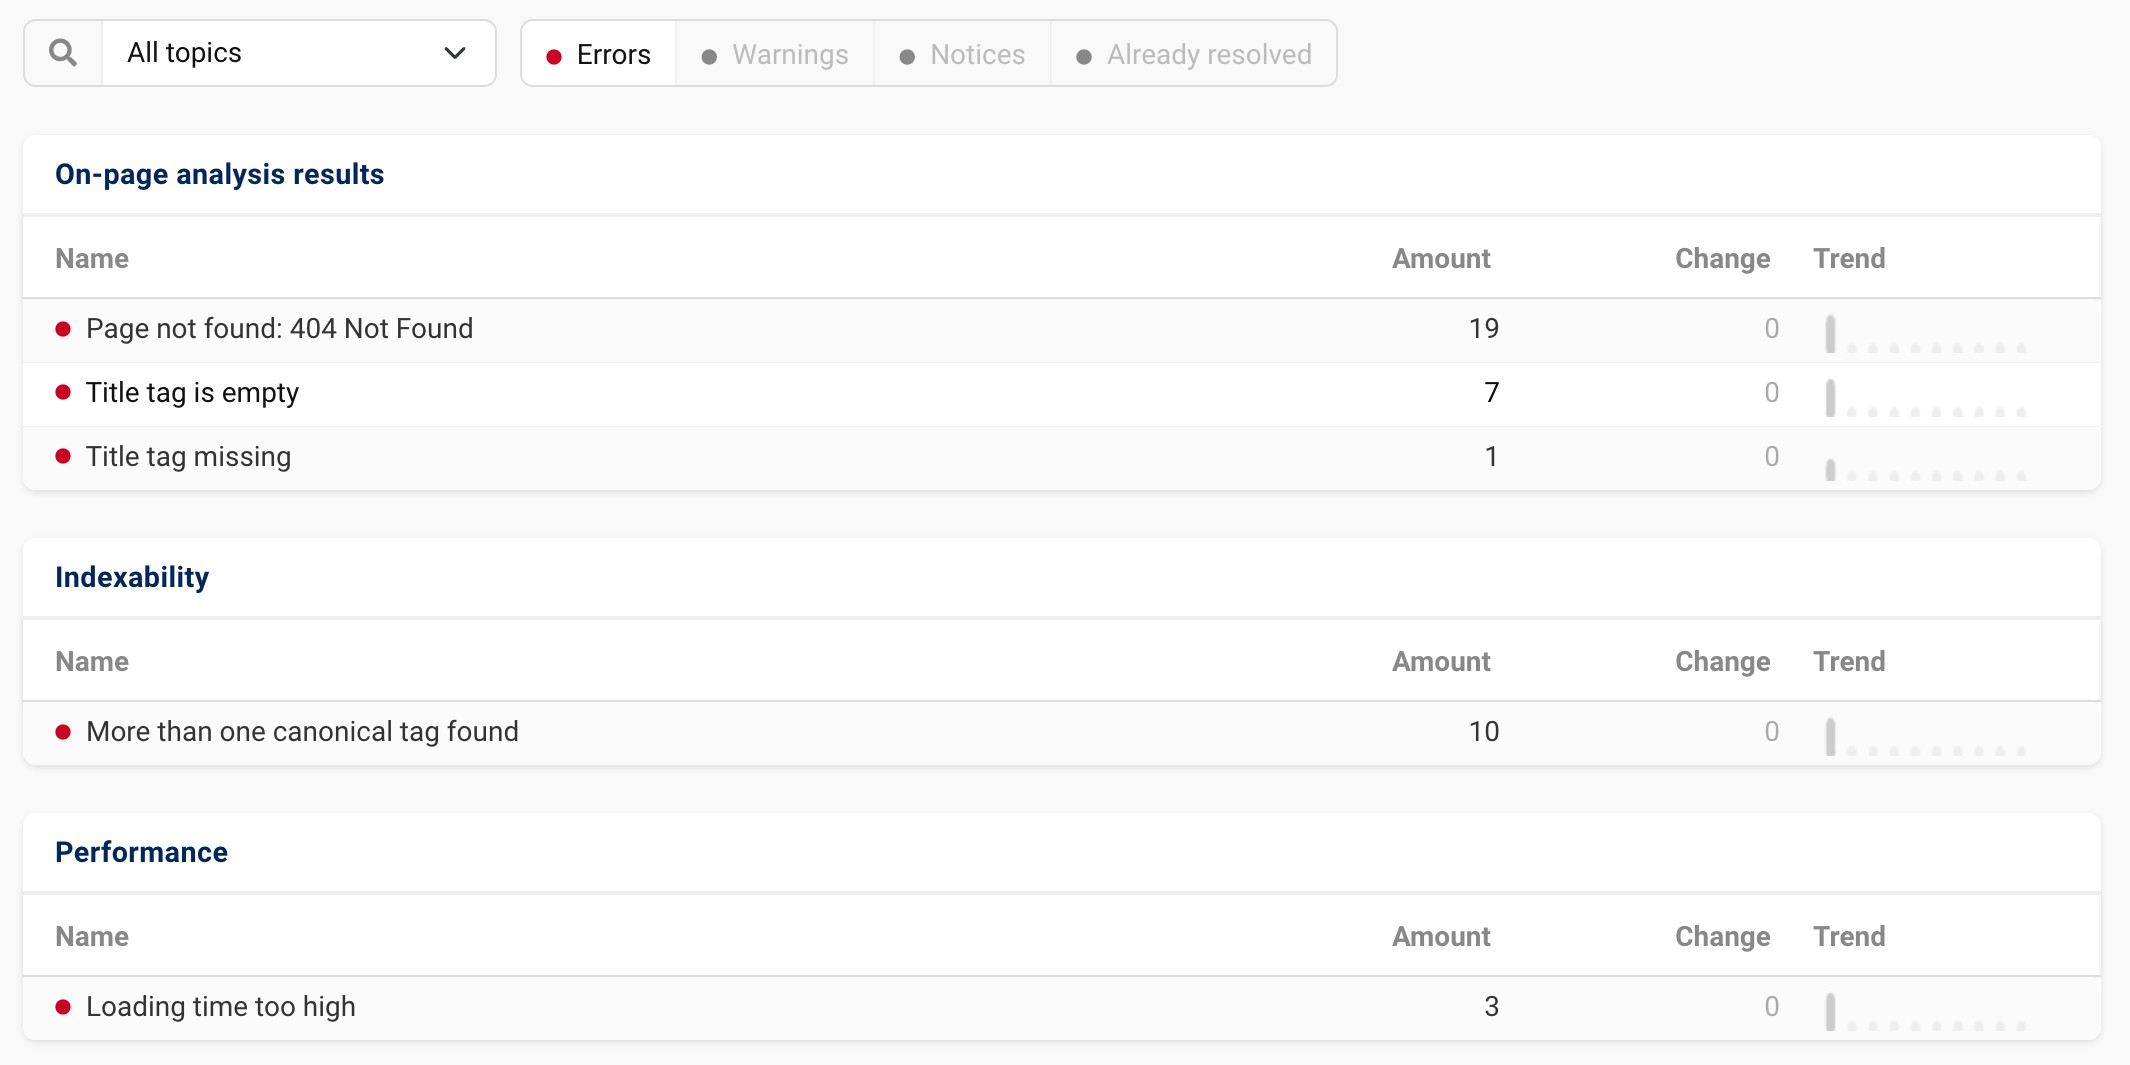
Our project for the domain thesun.co.uk currently addresses five error categories. Some pages cannot be found at all, others have an empty or missing title tag, for some more than one canonical tag was found, and again others take too long to load.

By clicking on the “Details” button 1, you will find details on the errors and the individual pages affected by the respective error. It appears when you hover the mouse over the error.
Let us select the error “Page not found” as an example. At the top you will find the info box previously mentioned with explanations for this error category.
Below that, we find a list of all URLs on which the pages could not be found. We also see directly where the URLs not found are linked from.
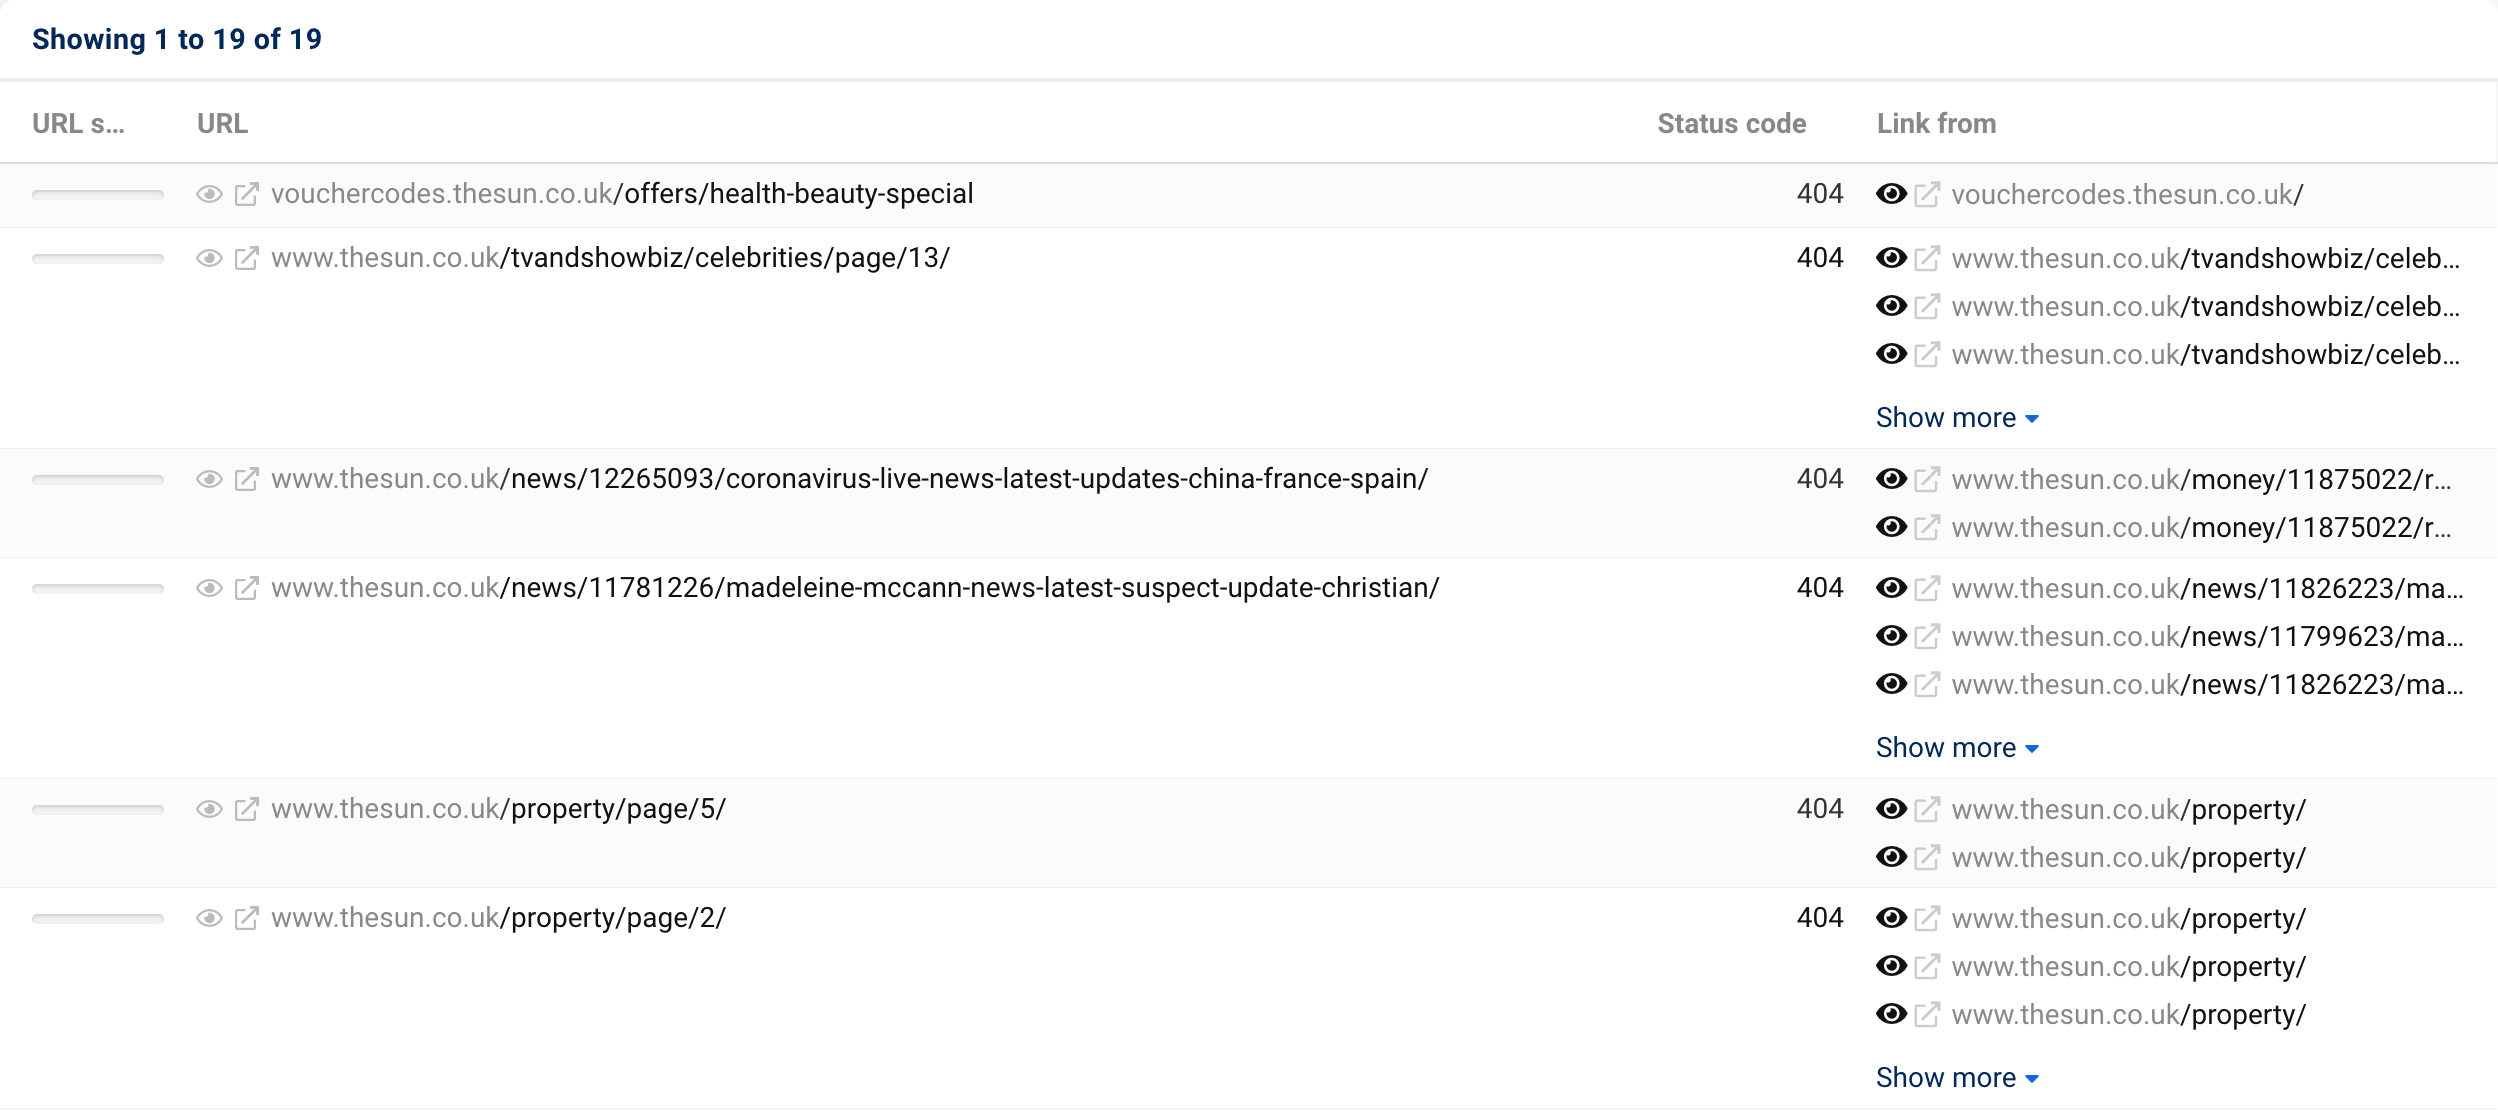
Using the symbol 2 in front of the respective URL, we can open the page in the browser directly from SISTRIX. This way you can check whether the error still exists or whether it has possibly already been fixed.
Opening the URL in the browser, we discover that we land on a 404 page. This page therefore does not exist any more. We can also click on the “Link from” link to open the URL that redirects to this page.
If we are the operators of the website, we should check why the pages are not accessible and whether we can remove the links to these pages – if the pages are no longer needed. You can also analyse the URLs further with the “URL check”. We explain this in the tutorial “Onpage Analysis of Individual URLs in SISTRIX“.
Conclusion
You should now proceed with the other errors in the same way as with the pages not found. Have a look at which types of errors they are and what you can do to fix them. As described above, you can then also address the warnings and notices.
After your OnPage project has been crawled for a few weeks, you will see how the number of OnPage problems has developed over time on the Project Overview page – whether you were able to fix errors or whether new warnings have come up.