
A SISTRIX Onpage project gives you control of our engines to perform tailored SEO analyses. In this handbook we’ll explain how to create a project and which elements can be found in the overview. A video tutorial can be found below.
Get Started With the SEO Analysis
To analyse a website with SISTRIX on the basis of onpage ranking factors, a project must be created.
First log in to SISTRIX. On the startpage, you will then find the button in the blue navigation bar that will take you to the projects. Alternatively, you can also use the direct link https://app.sistrix.com/projects.
To begin your analysis, click on the green “Create new project” button and enter the project information.
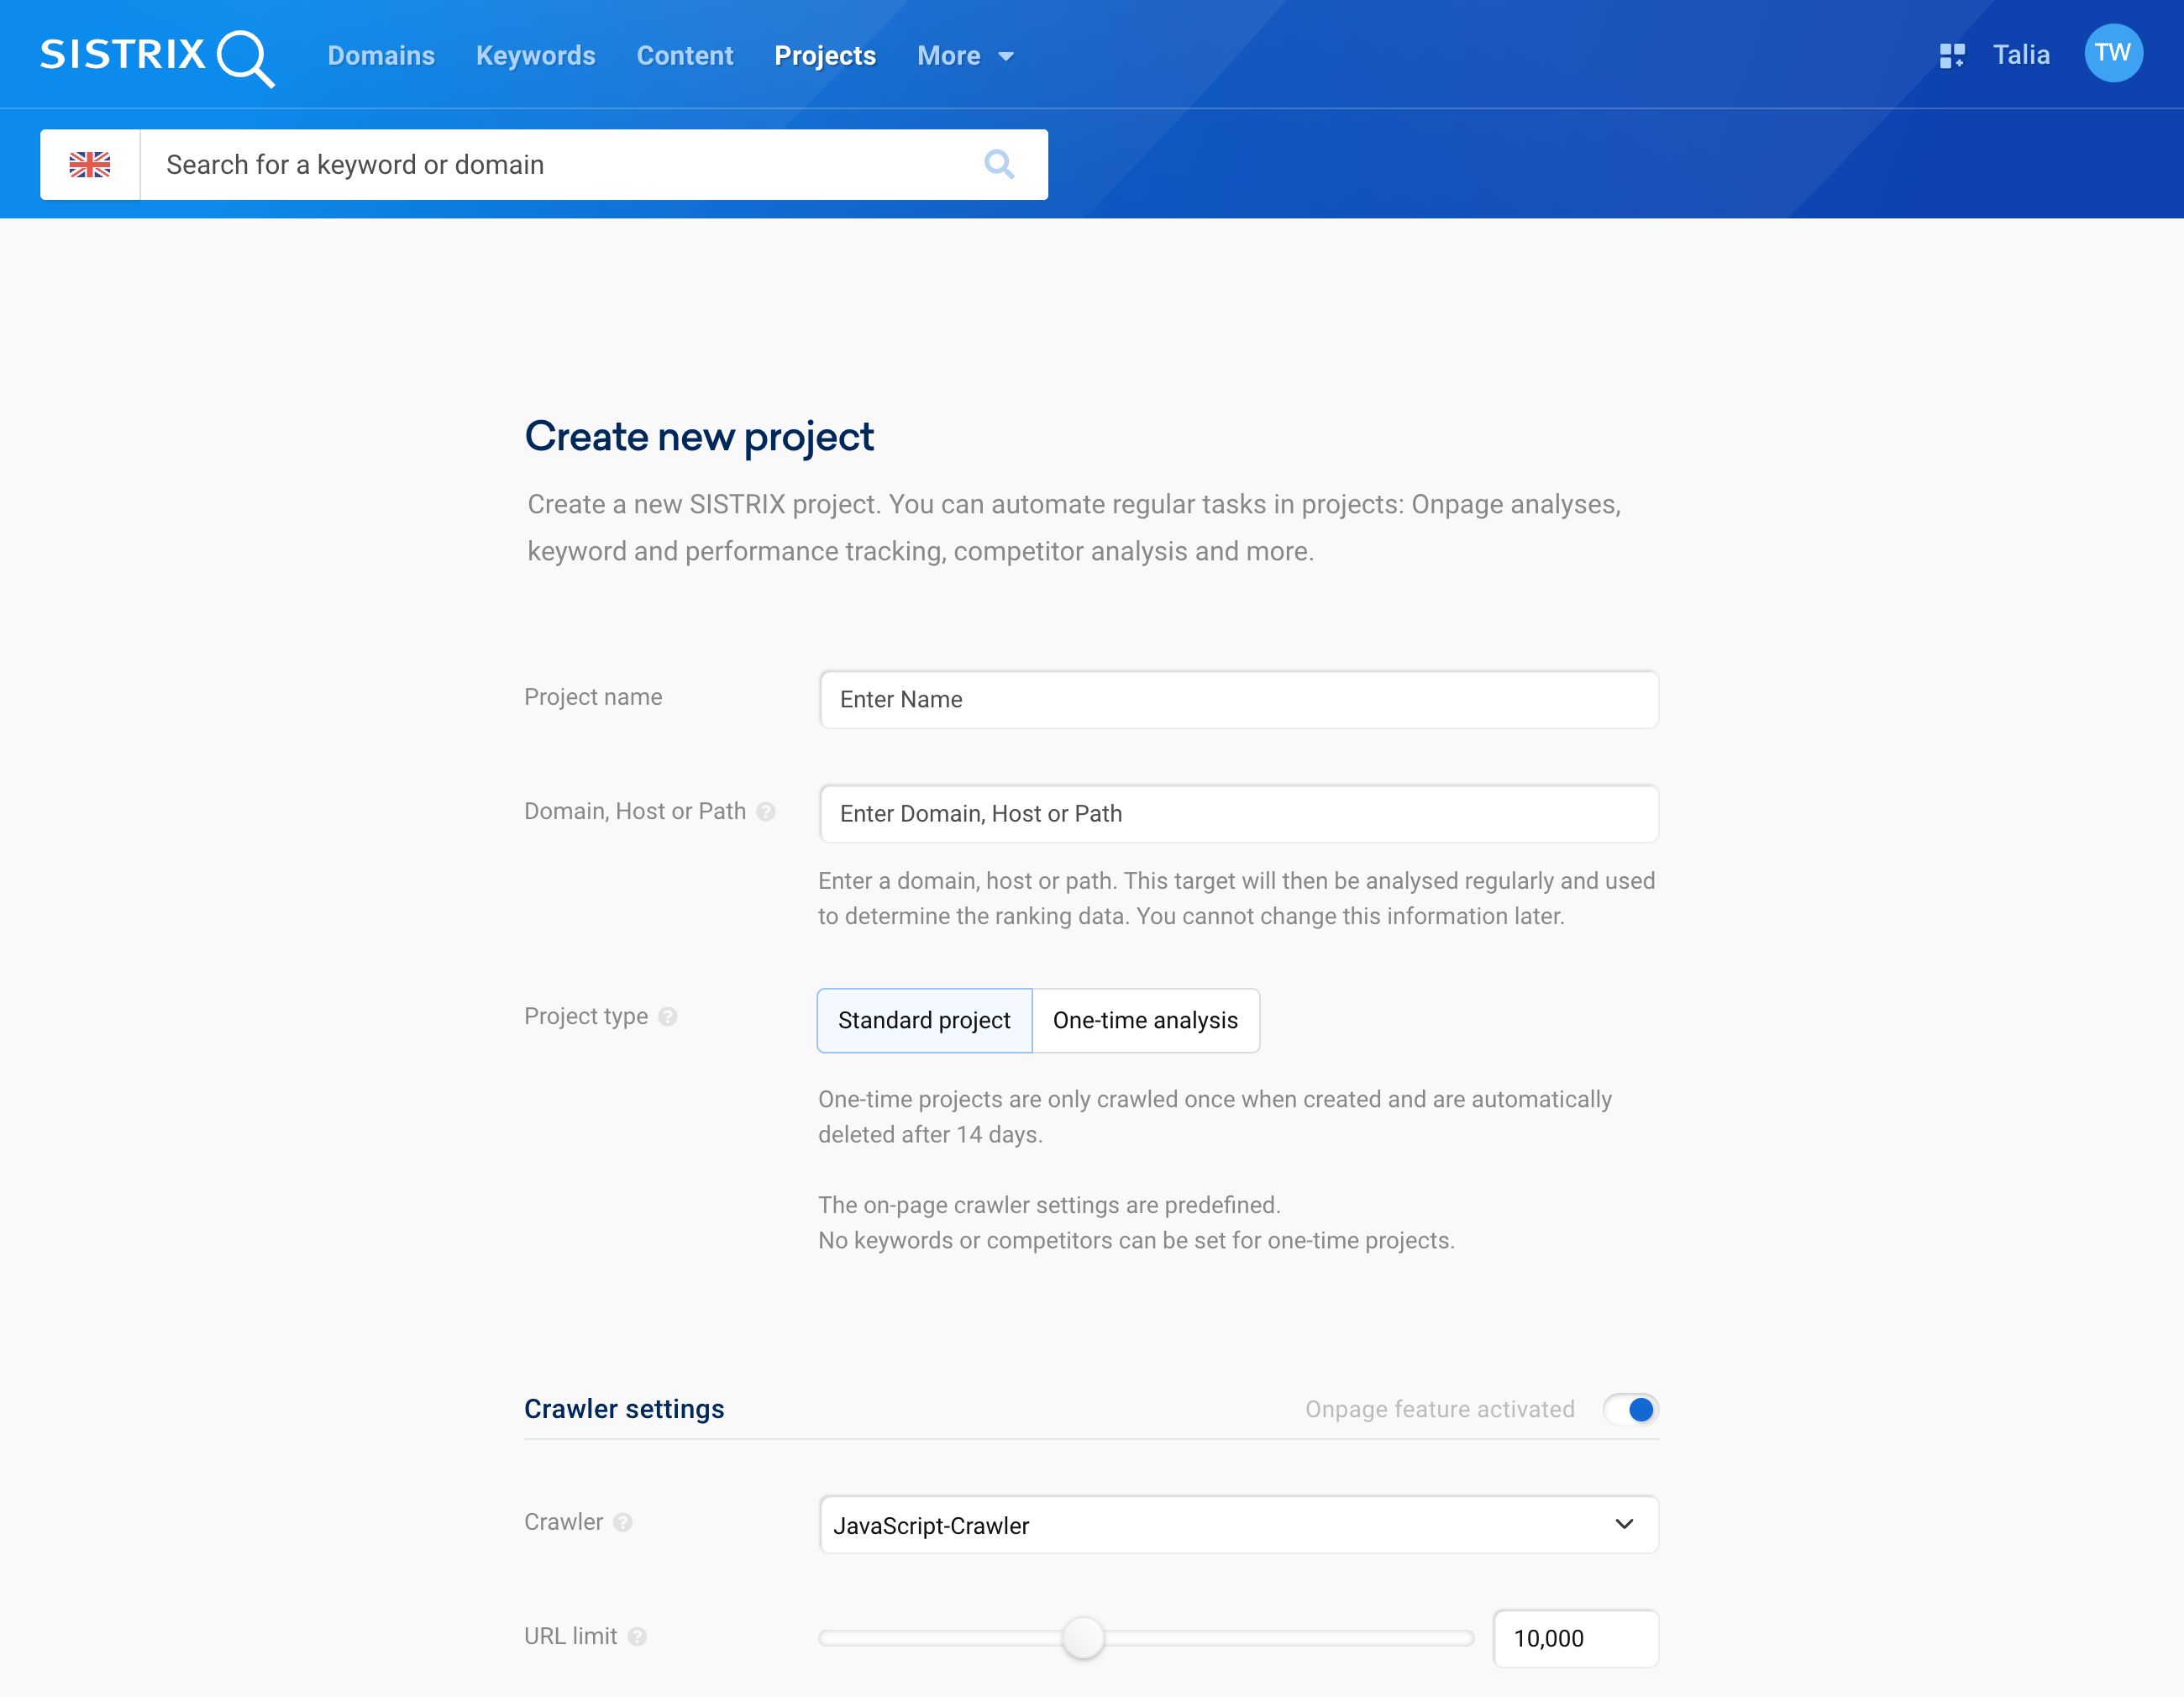
Project name
Specify a project name so that the project can be easily recognised later in the project overview. If you do not specify a name, the domain name will be used as the project name. You can change this name at any time later.
Project scope
This is where you define the project scope for the entire project. The input is used for the onpage crawler as well as for keyword tracking and other areas of the project. You have the following options:
- Domain: If you enter a domain (sistrix.com), all subpages of this domain are analysed. This applies to all subdomains and subdirectories. This option is the right one in most cases and analyses the entire domain.
- Host: If you enter a host or subdomain (www.sistrix.com), only the subpages on this subdomain are analysed.
- Path: If you use a path or a directory (https://www.sistrix.com/blog/), only subpages within this directory will be analysed. Please include the protocol (http:// or hopefully https://).
Project type
In addition to the normal projects that are regularly updated automatically, one-time analyses allow you to use SISTRIX’s onpage analysis just once for a domain. The data is automatically deleted after two weeks. Only the onpage analysis features are available.
Crawling engine
You can choose between different crawling engines with different advantages and disadvantages for the processing method of the crawled HTML files:
- HTML crawler: With this crawling engine, the HTML that we read from the server is analysed directly without intermediate processing. As a result, the crawler is very fast. Google previously used a comparable crawler.
- JavaScript crawler: Here we use a modified version of the Google Chrome browser to process HTML in the same way as the Google crawler does. Most of the JavaScript queries are carried out and the modified HTML is analysed.
- Mobile crawler: This crawling engine corresponds functionally to the JavaScript crawler. However, the (virtual) screen size is set to the size of a mobile phone screen. This crawler therefore comes very close to Google’s mobile crawler.
URL limit
The URL limit allows you to define the maximum number of different URLs that the onpage crawler should capture for this project. HTML pages with a valid status code (200) are counted, but not resources, redirects or other files.
Keywords and competitors
In the box called “Keywords” you can add keywords that should be monitored for the onpage project. The same applies to the “Competitors” box, where you can enter up to 3 competitors’ domains (or hostnames, directories or URLs).
Use the expert settings to assign global tags, set the crawling frequency or manage further settings for crawling your project.
Keywords and competitors are optional at this stage, so you can also leave these two boxes empty and add them afterwards, when your project is already created.
Note that the box “Keywords” also contains the referring country, which is important for the ranking and Visibility Index analysis of the website.
When you’re ready to start your analysis, just click on the green button “Create project and start analysis“.
Project Overview
When your project is ready the Toolbox will send you an email.
In the overview page of your project you’ll be able to see the first results of your analysis. Note that some boxes need at least two data points to show some results, so it’s normal to see them empty at the beginning of the project.
General options

The blue header at the top of the page will allow you to navigate the different sections of your project:
- Onpage: Onpage analysis of the website and its ressources.
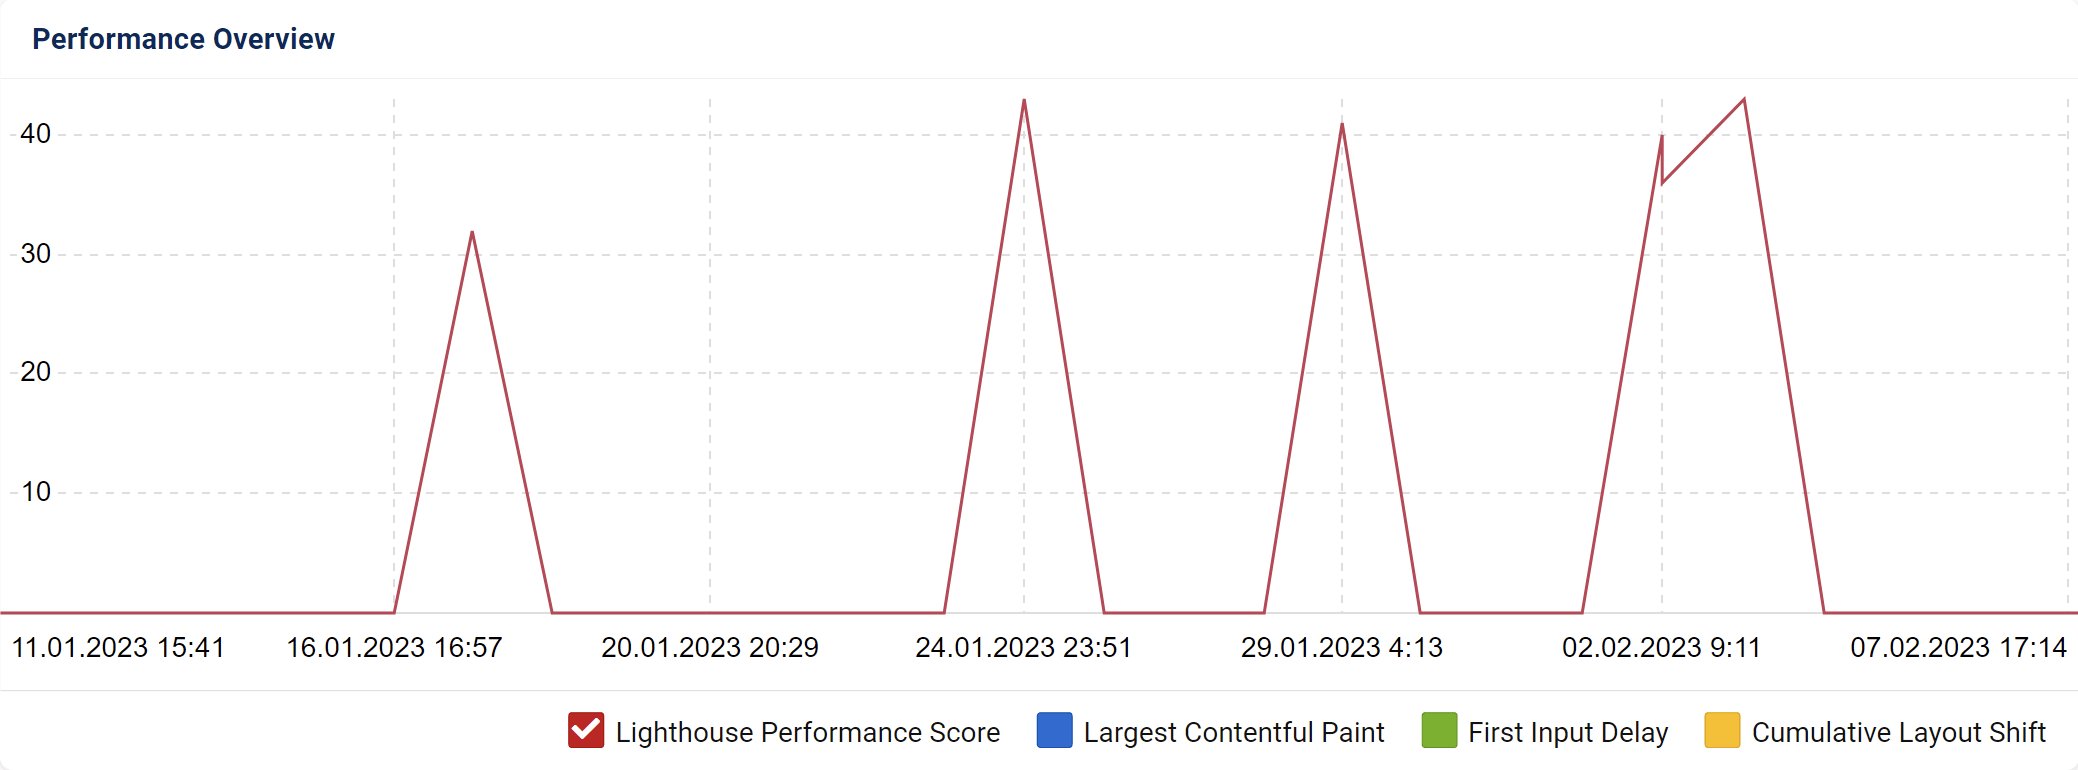
- Insights: Technical insights about the site’s performance and structure.
- Rankings: Individual Visibility Index and Rankings according to your own keyword set.
- Settings: Project settings.
You can use the dropdown menu on the right to quickly switch between projects.
Data boxes
In the project overview you’ll get a quick summary of your project’s key performance indicators. (KPIs)

The first four boxes show an overview of the website homepage and the total number of errors, warnings and notices found from the crawler.
Below them you’ll be able to search a specific URL of the website to see specific details, for example its title and meta-data.
Scrolling down, the Toolbox will show you the Visibility Index of the project and more information about its rankings and competitors. Note that this section will be available only if you add your keyword set to the project inside the “Settings”.
Finally, you’ll see an overview of the link profile and the number of social-signals for the evaluated domain.
Every box in the overview page can be opened into its corresponding section inside the project.
Other Features in the Overview Page
Besides your own projects, the overview page offers you other interesting features including shared videos and one-time page checks. Learn more here.